Page 7 of 9
Re: LF thoughts on this finger design please
Posted: Wed Feb 15, 2017 1:48 pm
by sleepingdog
I misled you, Stormy. I just meant that I would get non-stainless music wire instead of stainless.
Re: LF thoughts on this finger design please
Posted: Wed Feb 15, 2017 7:28 pm
by Storm Rosson
Ah shucks Dave I was just tryin to unload some of what I got, trying to free up some space hehehe

Re: LF thoughts on this finger design please
Posted: Sun Feb 26, 2017 3:26 pm
by sleepingdog
Well, I got one part machined for the prototype single-string changer today. It took me about 4 hours to make it

. Most of the time was spent learning how to do the machining as I'm a complete novice at it. I think it worked out fairly well, though, and I know what I have to do now when it comes time to make the real ones out of brass.
I'll try to get the raise and lower plates done this week so that I can get the prototype rigged up next weekend.
One question, though. It's a fairly snug fit but I can insert the bearing just with my fingers. Should I be undersizing the hole and pressing the bearing in?
[EDIT] When I went to assembly the finger assembly I found that I had machined this part incorrectly. My drawing was correct - I just didn't follow it properly.
Re: LF thoughts on this finger design please
Posted: Mon Feb 27, 2017 10:35 am
by Ross Shafer
Teaching yourself the machining as you go...great job!
You will want a press fit, not too tight as it can affect the bearing performance. Best to do some testers to be sure but I'd be looking for a .001"-.0015" interference fit.
Can't do that with drills of course, you will need to use a boring head (overkill) or a reamer. Drill the hole undersize (.01-.02" under should work). Then use a reamer .001-.0015 under the bearing diameter and you should be good. Reamers are available in a zillion sizes from numerous sources, MSC, McMaster Carr, Enco, Etc.
Lookin good, keep at it!
Re: LF thoughts on this finger design please
Posted: Fri Mar 03, 2017 6:26 pm
by sleepingdog
Thanks, Ross. I've purchased at 0.499 reamer and I've done one test so far. The bearing is tighter than the one where I just used a 1/2" drill, but still not "press-fit" tight. I will try some more tests now that I've watched a few yootoobs on how to actually use a reamer

.
I have the raise and lower pieces made and I'm starting to look at assembly of the prototype finger assembly.

What is the trick to getting the head of the bearing rivet on the lower plate to clear the raise plate? I was thinking of countersinking the back side of the lower plate a little bit and then hammering the head of the rivet into the recess, then riveting the bearing on, and then grinding the head of the rivet flush (or nearly flush), with the hope that the material that's pushed into the countersink recess would be enough to hold it. Thoughts?
Re: LF thoughts on this finger design please
Posted: Sat Mar 04, 2017 8:07 am
by rtp_burnsville
Looks good thus far..... Nothing better than learning machining skills while building something useful.
Can you grind the head of the rivet just enough to give clearance? Somewhere I remember seeing low profile head rivets, just don't ask me where that was....

Robert
Re: LF thoughts on this finger design please
Posted: Sat Mar 04, 2017 10:19 am
by Ross Shafer
Run the reamer pretty slow, maybe 500 rpm or so, well slower than drilling and be sure to use some cutting oil. Have you mic'd the bearings to be sure they are spot on .5"?
Re: LF thoughts on this finger design please
Posted: Sat Mar 04, 2017 3:15 pm
by sleepingdog
Ok, things are going well, today. I slowed the RPM down to 500 as you suggested, went one size smaller for the pilot hole drill bit, used lots of cutting oil, stopped the mill once I was through and retracted the reamer without the machine running. Success! I now have a nicely pressed in bearing - not too tight, not too loose.
I also cut a v-groove in the raise and lower plates where the bend goes and did those two bends. They turned out really well.
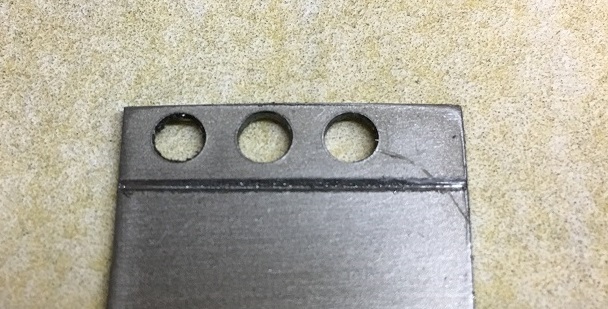
- V-groove for bend
- image1.JPG (95.65 KiB) Viewed 1375 times
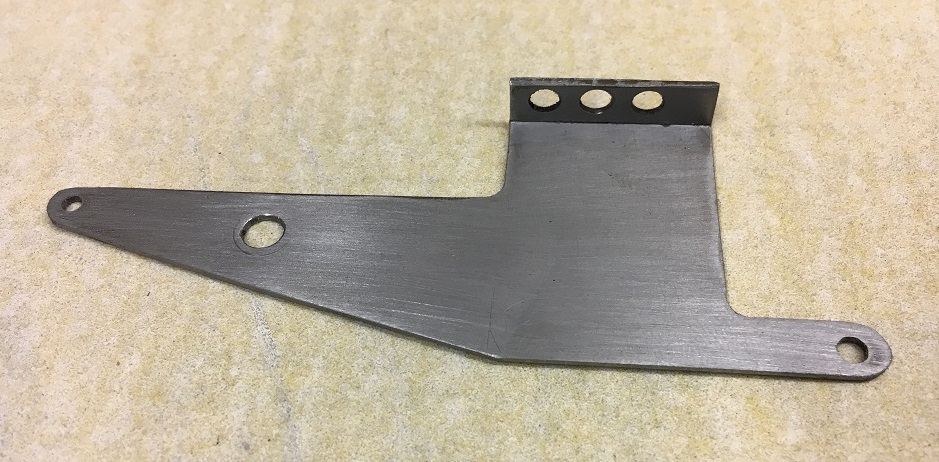
- Lower plate after bending
- image2.JPG (192.25 KiB) Viewed 1375 times
I then discovered that the aluminum finger that I machined last weekend was done incorrectly. I had one of the features on the wrong side, and I was missing a relief cut to make room for the lower plate. So I was fortunate enough to have to do it all over again

. More milling experience, though, so no biggy.
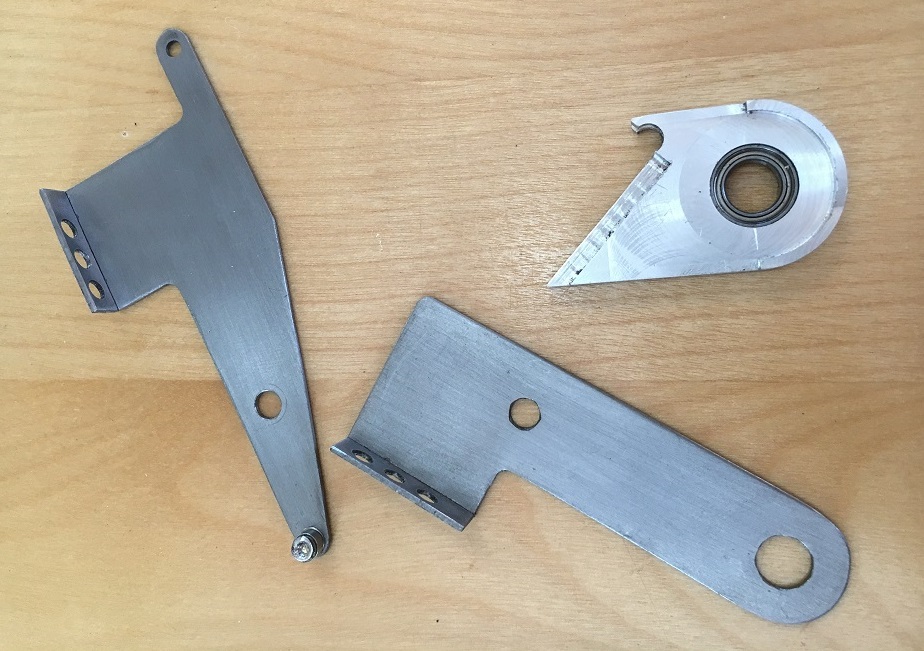
- Bearings installed, ready to assemble
- image3.JPG (214.3 KiB) Viewed 1375 times
I experimented with the countersink idea for recessing the head of the bearing rivet and that seemed to work fine so I went ahead and riveted the bearing onto the lower plate. My rivet setting tool is a POS, though, so I will have to get a better one. It didn't do a very pretty job. Good enough for the prototype, though. Riveting the two plates together, with a 0.005 PTFE washer between them went quite well. The joint moves very smoothly.
I'm happy with how it's going so far. Tomorrow, if I'm not too hung over (heading over to a buddy's place tonight to drink a few brews and do some pickin'), I will start to build the one-string mock-up. I'm also going to try to make a mandrel for winding return springs.
Thanks again to everyone that's been helping me out.
Re: LF thoughts on this finger design please
Posted: Sat Mar 04, 2017 3:16 pm
by sleepingdog
Oh yeah. The completed finger assembly...
Re: LF thoughts on this finger design please
Posted: Sun Mar 05, 2017 10:34 am
by Ross Shafer
lookin' good! How thick is your finger sheet metal and how deep is that v-groove?