The second one, Oahu-style: finished

Solid Body Steels, Reso, Weissenborn...
banjo980
Posts: 168
Joined: Wed Apr 06, 2011 11:45 am
Location: Noumea, New Caledonia

Re: The second one on the way!

Post by banjo980 »

Some more pics:
Image

Image

Image

Xavier
Bent
Posts: 1397
Joined: Mon Nov 02, 2009 3:10 pm
Location: Ontario Canada
Contact:

Re: The second one on the way!

Post by Bent »

Xavier, There is no doubt in my mind: You are an artist in the truest sense of the word. Everything - right from picking out the nicest wood to the final sanding and finish, your creations speak of high quality and beauty.
http://benrom.com/
21 BenRom pedal steel guitars, a Nash 112 and a 1967 TOS Milling machine with many cutters making one hell of a mess on the floor.
banjo980
Posts: 168
Joined: Wed Apr 06, 2011 11:45 am
Location: Noumea, New Caledonia

Re: The second one on the way!

Post by banjo980 »

Thanks for the kind words Bent :D
Paul Lafountaine
Posts: 332
Joined: Sun Jan 23, 2011 5:06 am
Location: Northern Ontario

Re: The second one on the way!

Post by Paul Lafountaine »

Hi Xavier,

Do I ever love the key head and inlay work. That is beautiful my friend. You should give us on the forum a detailed course on how you do that.

Paul
banjo980
Posts: 168
Joined: Wed Apr 06, 2011 11:45 am
Location: Noumea, New Caledonia

Re: The second one on the way!

Post by banjo980 »

Thanks Paul

I can let you know how I did that if it can help (but remember I'm not a pro)

As I'm at work I cant show you a picture of me holding the dremel at work, I developped for this time (never too late to progress :-)) a new way to handle it, pictures tomorrow

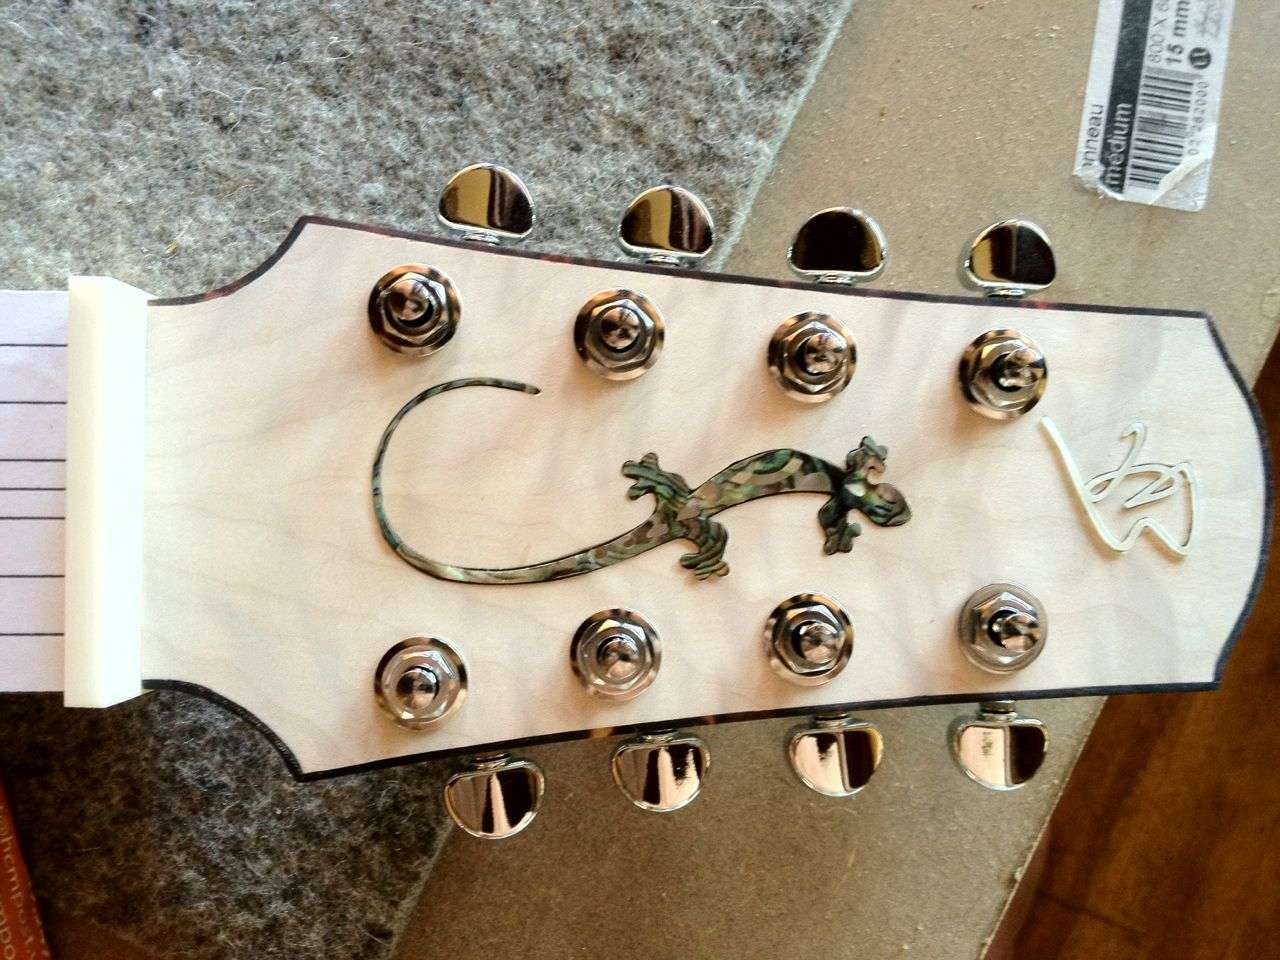
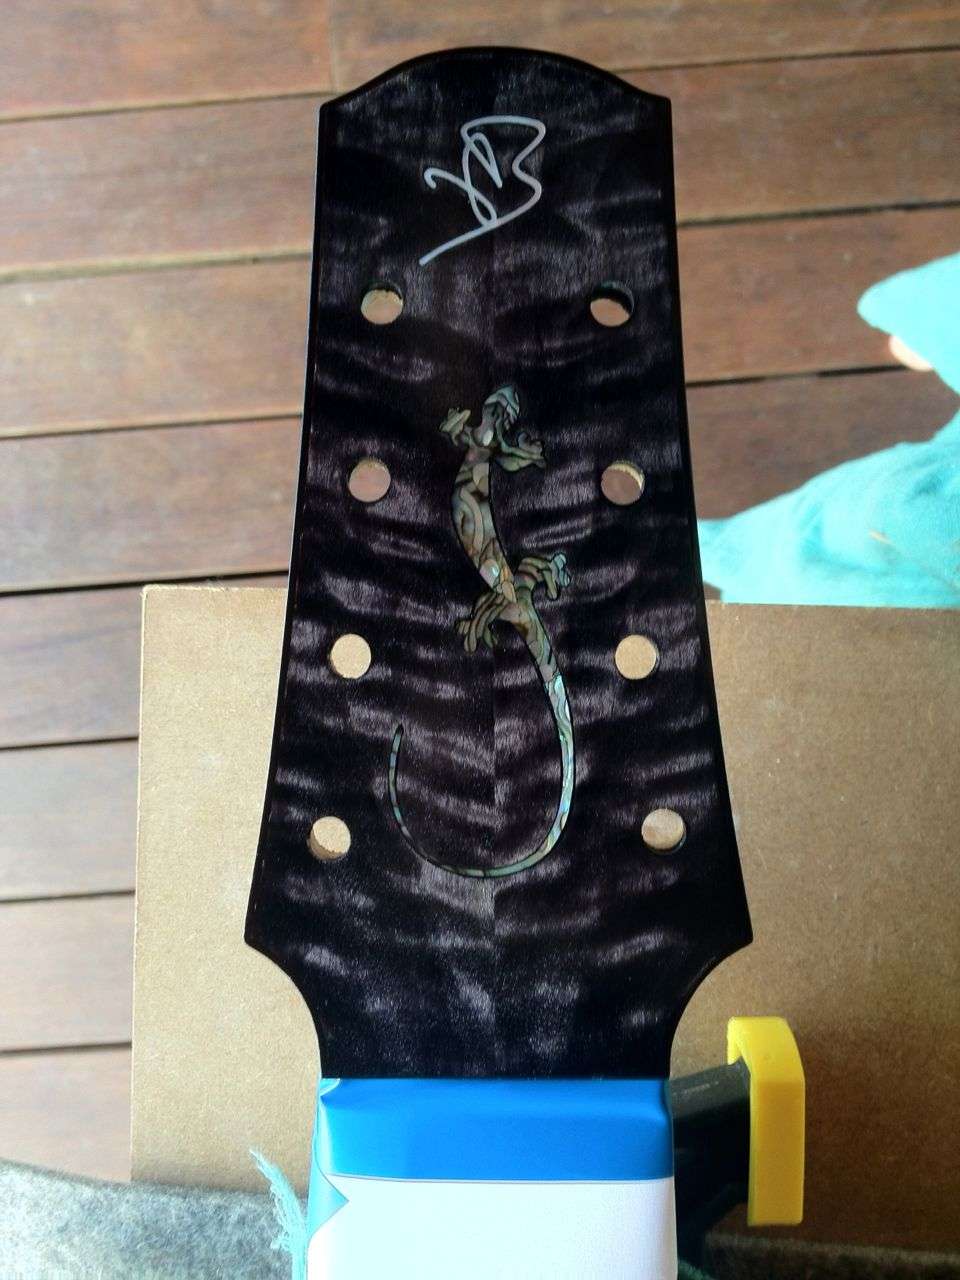
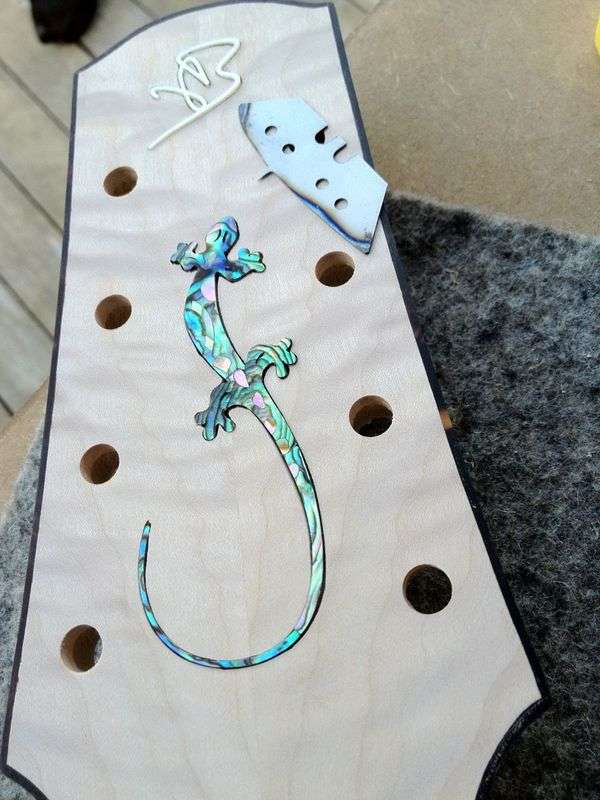
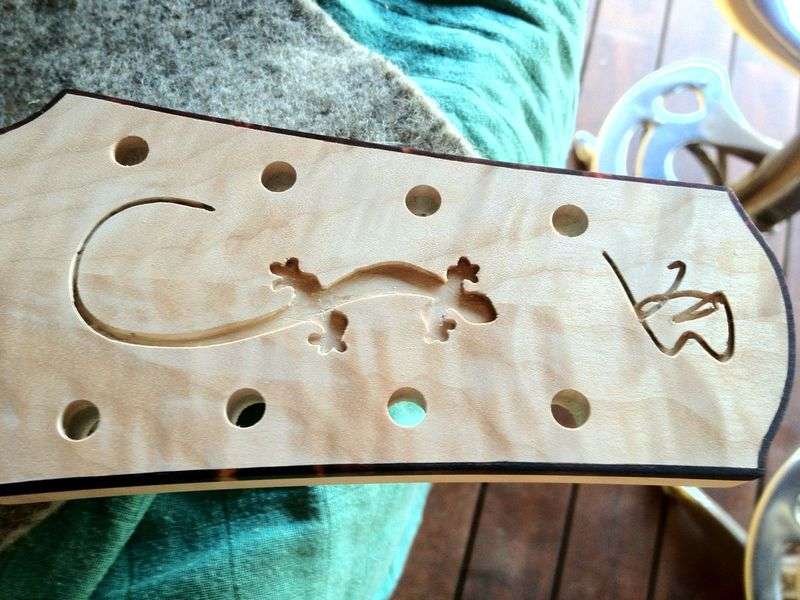
I think it's important to have a good drawing of the inlay... I use a CAD software (for the New yorker), or a .jpg file of the inlay printed at right scale (double check+++)

Then you glue the paper on the wood using spray neoprene glue. This glue doesnt wet the paper as white glue does, and paper is easy to remove when the job is done

Then carefully cut the paper and the wood fibers a little OUTSIDE the drawing with an XACTO (I did it too near from drawing and it was painfull to enlarge the cavities with a scraper I grinded in a razor blade:

Image

Image

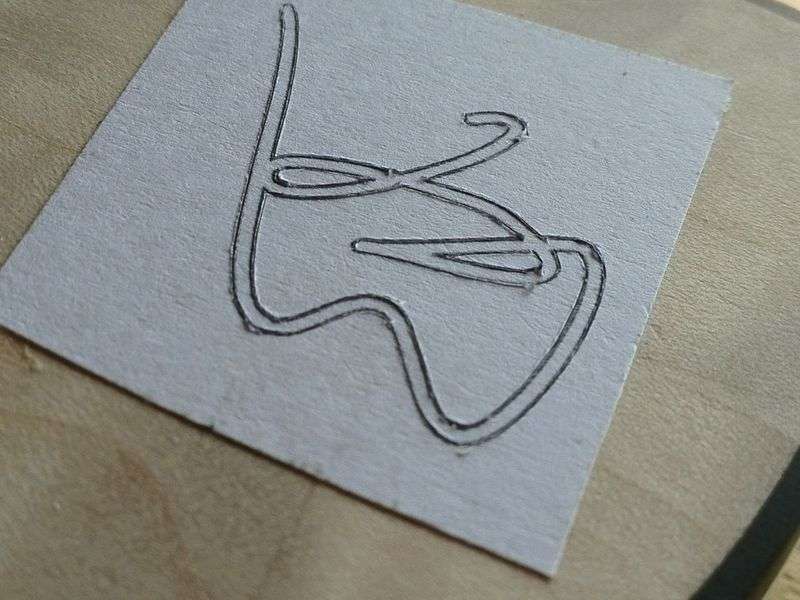
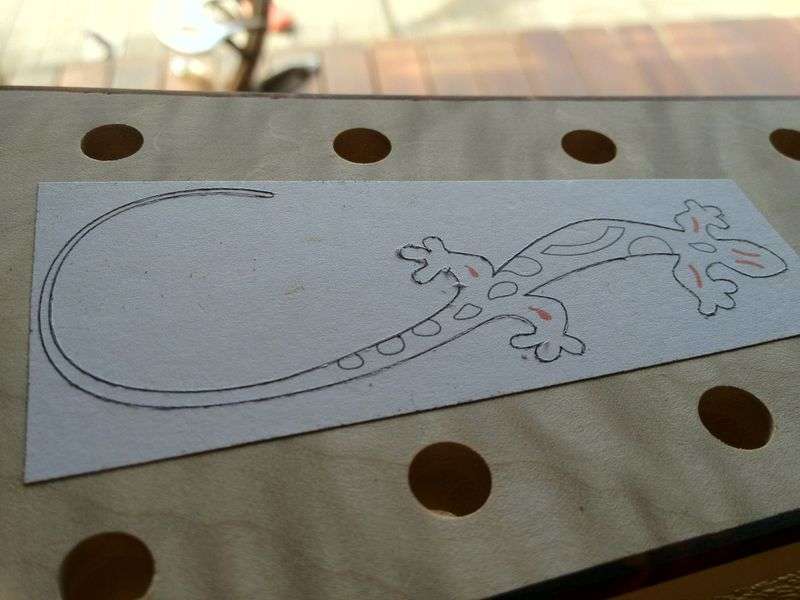
I use magnifying lenses to do that

Then rout with the dremel. If your XACTO job was good, you'll get clean cavities without pieces of paper coming inside the cavities.

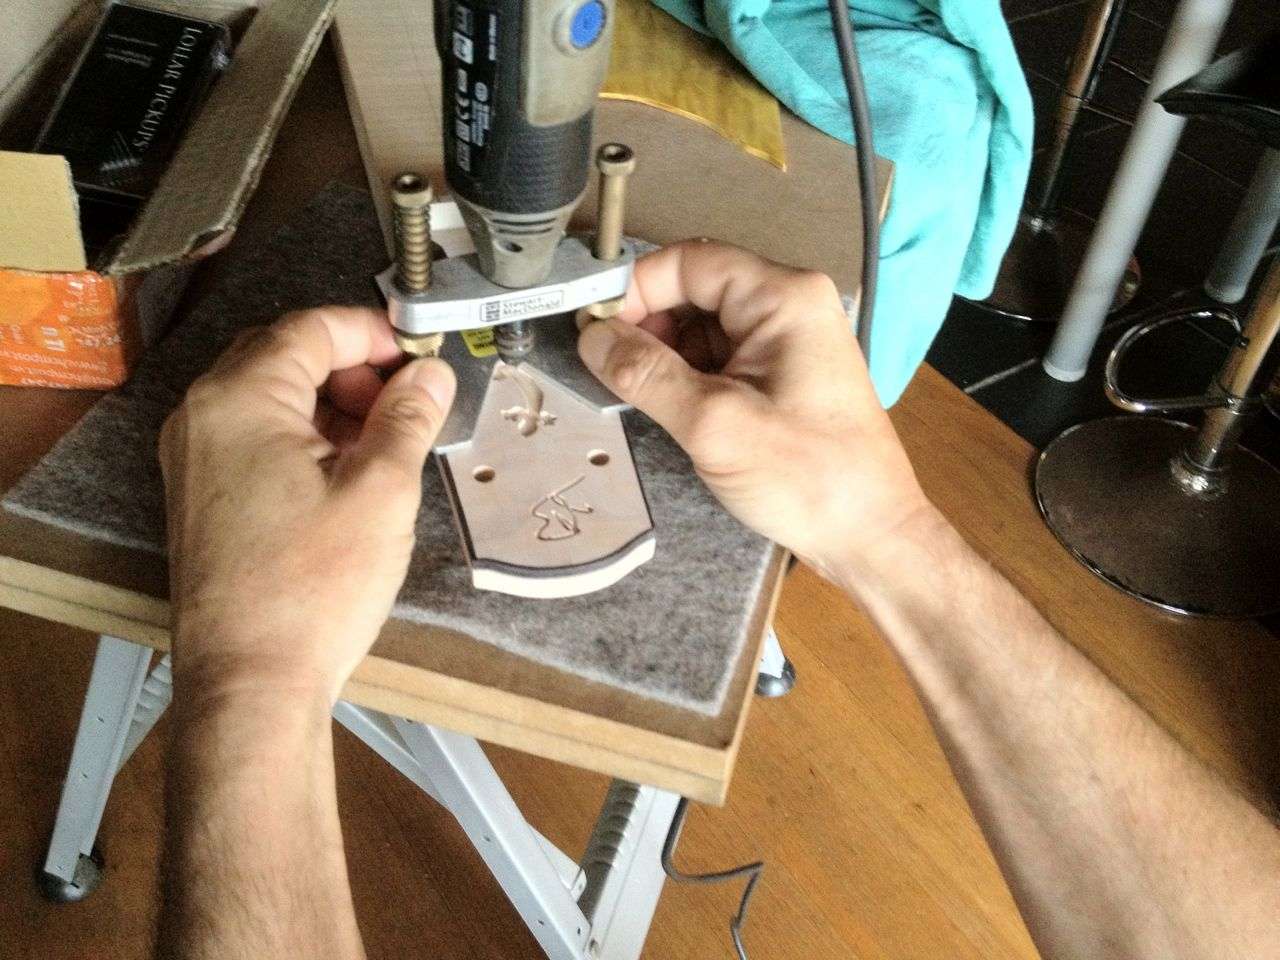
Hold the dremel router base with TWO hands, facing you, and use a piece of wood as armrest (you can see it below). My previous inlay works were not done this way and this one is really better

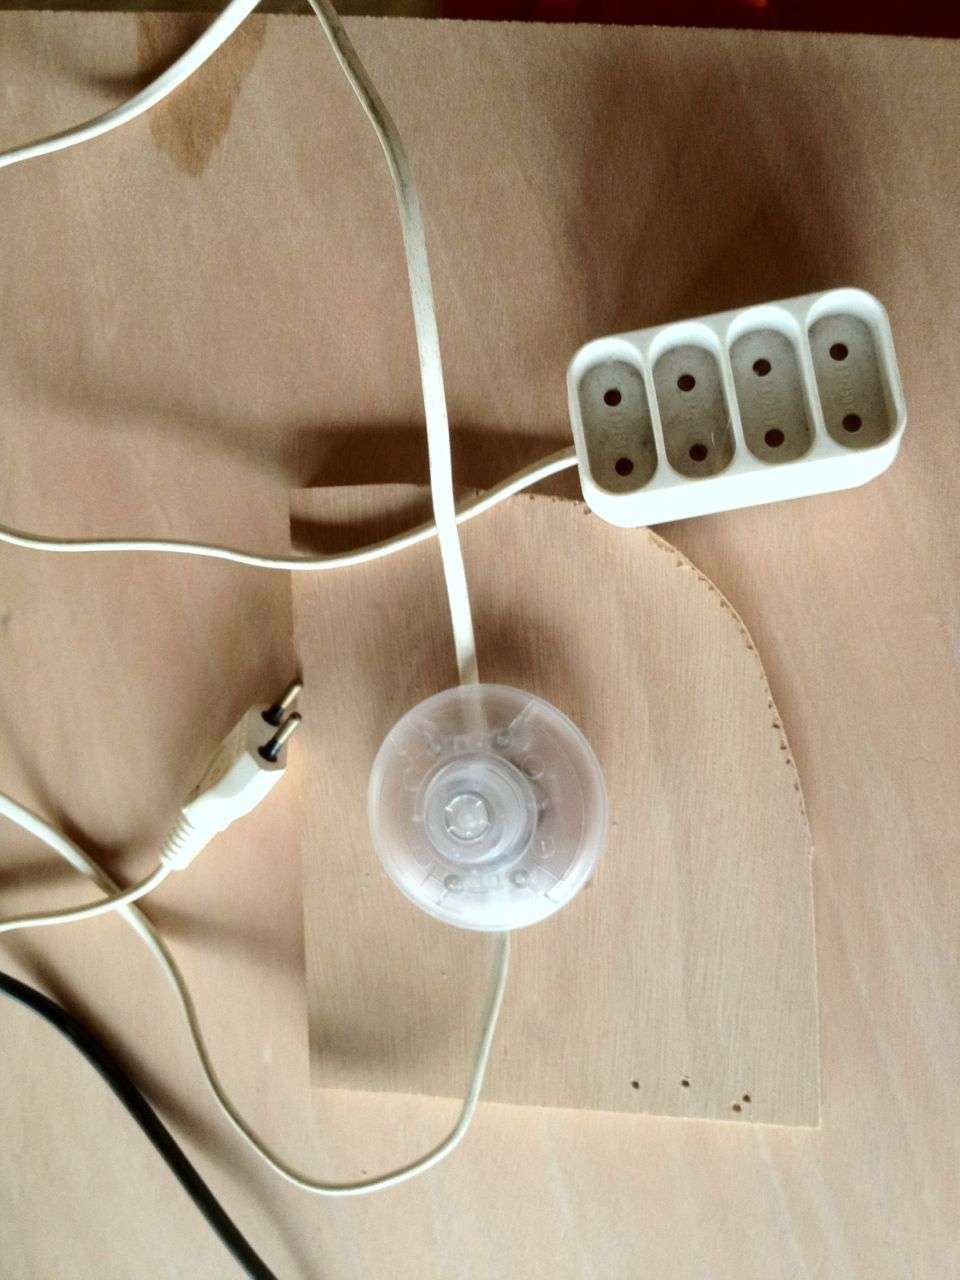
AND, I built a foot switch for the Dremel, really helps too

Image

Image

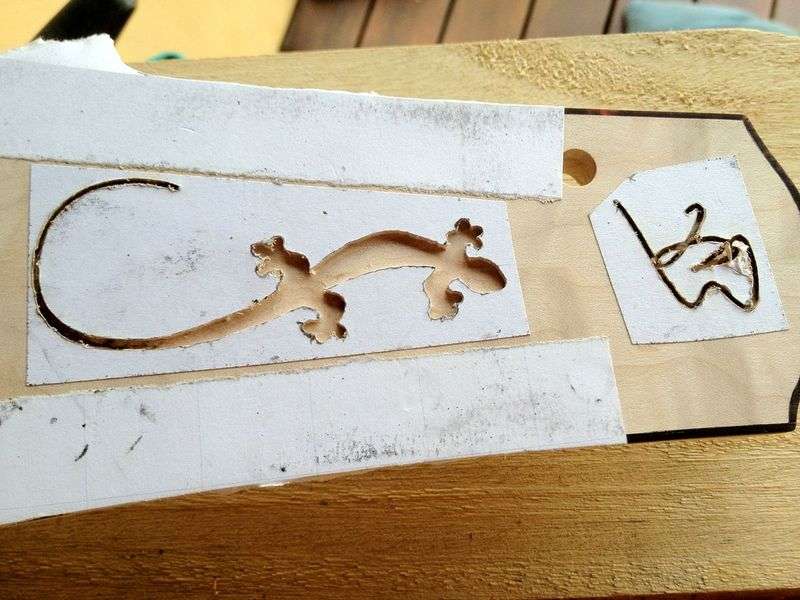
Then enlarge the cavities as necessary, the best tools are sterwmac micro chisels and a small home-made scraper...

Image

Image

I'll be away from home for work the next 2 weeks, no lap steel building... :mrgreen:

Image
Paul Lafountaine
Posts: 332
Joined: Sun Jan 23, 2011 5:06 am
Location: Northern Ontario

Re: The second one on the way!

Post by Paul Lafountaine »

Nice explanation of how you do the inlays. How deep do you cut into the wood for the inlays to be flush with the surface? from the pictures it looks like about 1/8", but I don't think that is right.

As for being jealous when you play the guitar, don't worry. My next build will look like your wife. LOL!

Keep up the good work my friend,

Paul
banjo980
Posts: 168
Joined: Wed Apr 06, 2011 11:45 am
Location: Noumea, New Caledonia

Re: The second one on the way!

Post by banjo980 »

Paul, the depth of the cavities depends on the inlay's thickness :D

I place the inlay on a flat surface, put the router base over it with the bit free to move, let it touch the flat surface near the inlay, lock the bit... That's it

It's better to glue the inlay's surface some 100th mms over the wood's surface, just beware the colored part of the inlay is still OK or you'll lose the color during the sanding process. You then can use black CA or epoxy (in ebony) to glue the inlay, and sand flush when set.
If you rout too deep, the inlay's surface will be lower than the wood. You'll have to use clear CA or epoxy to glue the inlay and fully cover it with the glue, that will have to fill the full cavity. That can be really nice in ebony, but dont forget to blacken the inlay's edges with a permanent marker, and beware the tiny bubles in the glue covering the inlay, they will be still visible on the finished product

In maple... I dont know :? I think I'll dye the wood black, as in light wood, a good inlay job is impossible mission


The foot switch :D :
That really makes the difference

Image

Th way I hold the dremel BEFORE this time... inaccurate:

Image

and this time:

Image

Two hands control, and armrest... :D
banjo980
Posts: 168
Joined: Wed Apr 06, 2011 11:45 am
Location: Noumea, New Caledonia

Re: The second one on the way!

Post by banjo980 »

Hello boys,

Here's the washcoated headstock:

Image

Now building the grain of the top:

Image

Xavier
banjo980
Posts: 168
Joined: Wed Apr 06, 2011 11:45 am
Location: Noumea, New Caledonia

Re: The second one on the way!

Post by banjo980 »

Hi guys,

Burst is done... :D

Image
maxi19
Posts: 365
Joined: Mon Oct 22, 2012 12:55 pm
Location: Milton Keynes, England

Re: The second one on the way!

Post by maxi19 »

That is beautiful and extremely professional, your instructions on inlay work make it look easy, a sign of an excellent craftsman.

Ron Mc
Post Reply