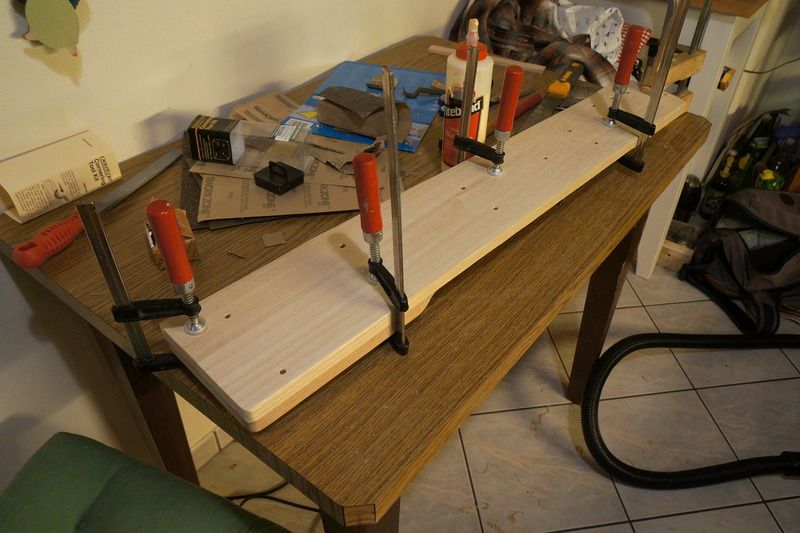
8-string lap steel build

Solid Body Steels, Reso, Weissenborn...
RomanS
Posts: 19
Joined: Sat Apr 24, 2010 6:50 am

Re: 8-string lap steel build

Post by RomanS »

Worked a bit on the 6-string Multibender steel for my friend today - cut out the body parts with my jigsaw; still needs a lot of sanding, then I can glue the two parts together, and try rounding the edges with those Veritas tools.
This one is going to be painted, thinking about milk-paint & wax, I'm leaning towards either barn red or daphne blue, but I'm letting my friend pick the color...

Image

Image
maxi19
Posts: 365
Joined: Mon Oct 22, 2012 12:55 pm
Location: Milton Keynes, England

Re: 8-string lap steel build

Post by maxi19 »

It's looking good!
RomanS
Posts: 19
Joined: Sat Apr 24, 2010 6:50 am

Re: 8-string lap steel build

Post by RomanS »

Bit of progress:
After rounding the edges with my new cornering tools, I glued the first wing to the body of my new steel:

Image

Drilled & chiselled the underside of the other wings for an electronics compartment - going to glue that to the body as soon as the other wing has set...

Image
RomanS
Posts: 19
Joined: Sat Apr 24, 2010 6:50 am

Re: 8-string lap steel build

Post by RomanS »

I also continued with the 6-string for my friend; rounding the edges with the cornering tools:

Image

Really easy, you just have to make sure you work WITH the grain, not against it, with a little bit of sanding the result looks quite good:

Image

Made some channls in the back, for the ground wire to the bridge, and the wires from the pickup to the pots:

Image
RomanS
Posts: 19
Joined: Sat Apr 24, 2010 6:50 am

Re: 8-string lap steel build

Post by RomanS »

Then I brought out the glue again:

Image

I don't have a lot of clamps, but with the screws holding the back and the neck together, the it should work...

Image
maxi19
Posts: 365
Joined: Mon Oct 22, 2012 12:55 pm
Location: Milton Keynes, England

Re: 8-string lap steel build

Post by maxi19 »

You are making a great job of that, we are looking forward to the finished product.

Best Regards Ron Mc
RomanS
Posts: 19
Joined: Sat Apr 24, 2010 6:50 am

Re: 8-string lap steel build

Post by RomanS »

Thanks!
Working night shifts currently, didn't get a lot done - just glued up the other body wing. THinking about NOT painting the aluminium, but trying to polish it a bit more, and leaving it plain.

Image
RomanS
Posts: 19
Joined: Sat Apr 24, 2010 6:50 am

Re: 8-string lap steel build

Post by RomanS »

Drilled a hole for the jack on my friend's steel, filled the screw holes on the back and the crack between the two boards on the side with wood putty - once that has set, I will sand it smooth and start painting it.

Image

Put a first coat of amber shellac on my steel; also tried to wipe some shellac onto the freboard, to mellow that glaring white - unfortunately that turned out a bit splotch, plastic is not the ideal surface for using shellac; might have to redo it or think of something else...

Image
RomanS
Posts: 19
Joined: Sat Apr 24, 2010 6:50 am

Re: 8-string lap steel build

Post by RomanS »

Image

First coat of milk paint is on my friend's steel - needs more sanding and a few extra coats.
Also, tried again to coat the fretboard with shellac; apparently, it is impossible to do this without spraying equipment; I tried brushing it on, wiping it on with a sponge, with wadded up cloth, with kitchen towels,... No chance to get an even finish on this non-porous, rubbery, but very smooth surface, it always turn out splotchy; finally gave up, and in the spirit of "It's a feature, not a bug!" made an extra-splotchy finish by just dripping some of the shellac onto the fretboard, and swirling it around, giving it a kinda marbly look; not completely sold on it yet - what do you think?
RomanS
Posts: 19
Joined: Sat Apr 24, 2010 6:50 am

Re: 8-string lap steel build

Post by RomanS »

UPDATE:
Been abroad visiting family for the last week - so the paint had enough time to dry (I put about two coats of milk paint, one of shellac, and one of TruOil on my friend's steel, and two coat of shellac plus one of TruOil on mine).
Got back this afternoon, bit exhausted after 7 hours of driving - just did a little bit of work today, started with my friend's steel, he's going to be touring in Northern Germany in a few weeks, so I need to finish his steel soon...

Put some self-adhesive felt pads on the back of the steel, to prevent it from slipping on the knees:
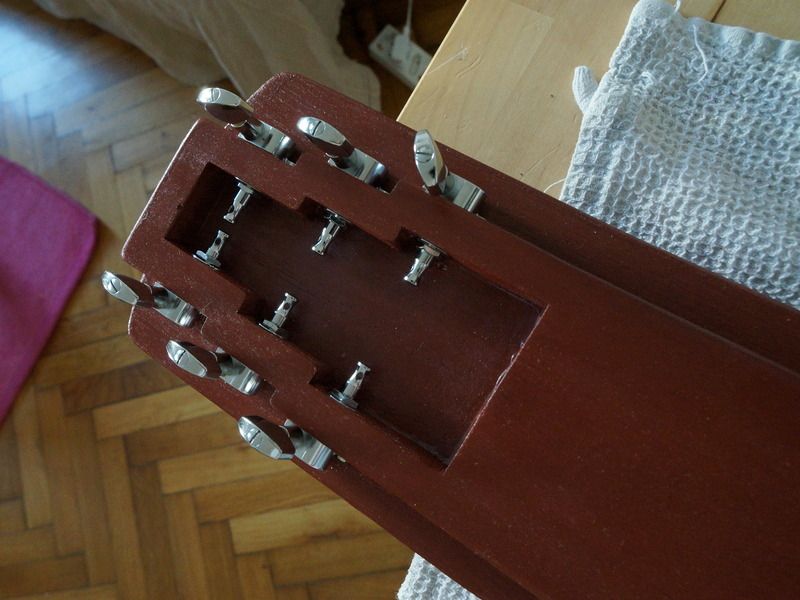
Image

Mounted the tuners:

Image

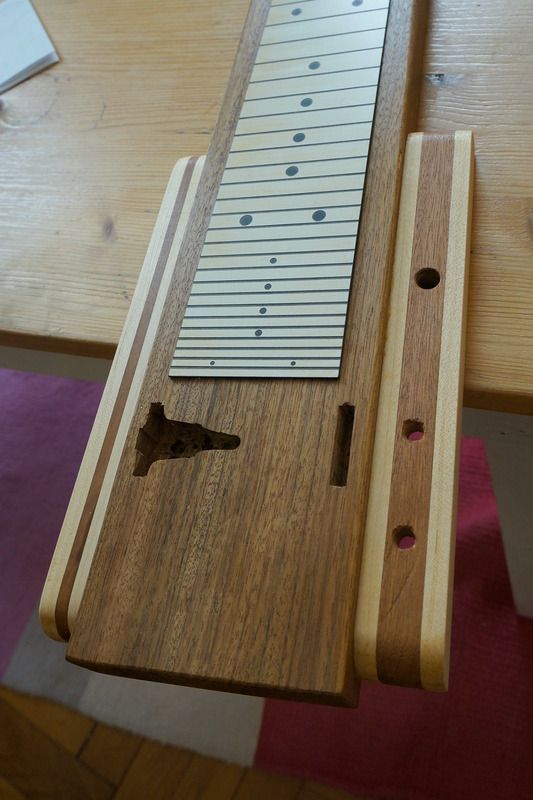
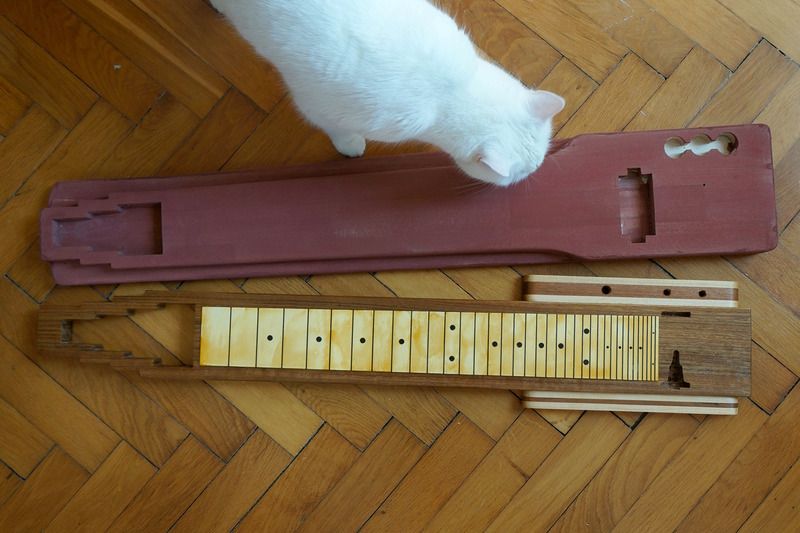
Started working on a nut:

Image

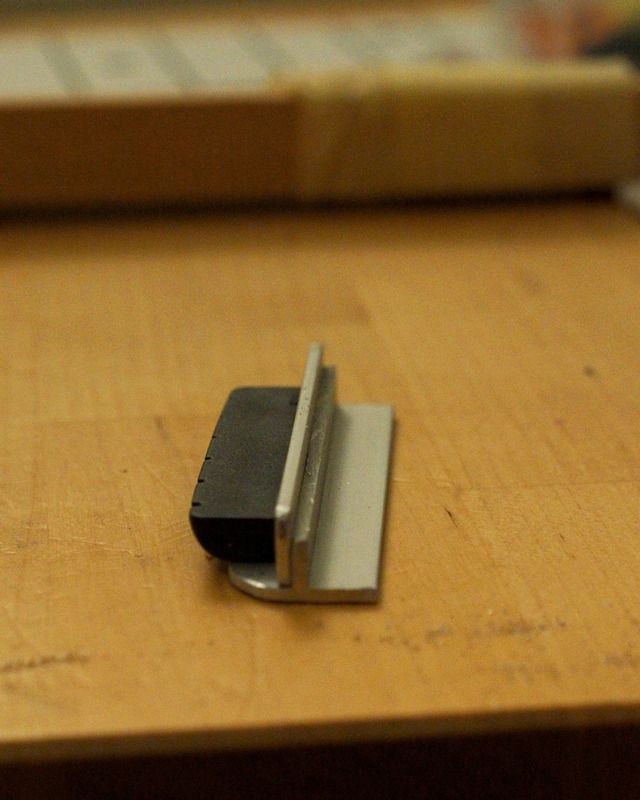
Usually on my steels I just use aluminium L-angle bar; but because of the Multibender I wanted something with less friction; couldn't find an affordable roller nut with wide enough string spacing, so I got the widest Graphtec nut I could find; since it is too low for a steel, I made a composite of aluminium T-bar, with a piece of flat alumium bar on top - to raise the nut a bit more, and to hold down the end of the plastic fretboard; still need to file the nut slots when it is mounted - they are radiused for a regular guitar, need to get them so the tops of the strings sit in a straight line, so you don't need to much bar pressure when playing...

Oh, and I made a paper template for the control plate (no photo).
Post Reply